Vape Coils - A Beginner's Guide
Mar 16, 2026

Vape coils are one of the most crucial components of your vape. While a car can't run without an engine, the same can almost be said about coils and vapes. Coils heat your vape's e-liquid to produce the vapour you inhale, impacting flavour, vapour production and vape performance. Whether you're a new or experienced vaper, this guide lays out what coils are, the different types and maintenance methods you can use to help you make the most of your vaping experience.
What are Vape Coils?
Vape coils are the tiny but essential elements that make vaping possible. They usually consist of a metal or mesh wire wrapped around an absorbent cotton wick. You will usually find vape coils in any atomiser, which is the core element where they're found within vape tanks. Vape coils are available in a range of coil resistances, supporting beginner (mouth-to-lung), intermediate (restricted-direct-to-lung) and advanced (direct-to-lung) vaping styles.
Coils have a major influence on flavour, vapour production and your vape's overall performance. They're typically made from mesh metal for faster heating and improved flavour, though they sometimes use kanthal, stainless steel or nickel.
Other Vape Coil Terms
- Atomiser Head - These are often referred to as 'coils', but they're actually the entire unit that house the wire and wick within the tank.
- Replacement Coil - This is a standard term for replaceable vape coils.
How Do Vape Coils Work?
Vape coils are the heating elements found inside vapes or vape tanks. The wire's purpose is to heat the e-liquid while the wick absorbs the e-liquid, turning it into vapour when heated. Each time you draw from your vape, the battery powers up your coil, heating the e-liquid soaked in the wick, then producing the vapour. The vapour then passes from the vape tank and into the mouthpiece for you to inhale.
The coil type has a big effect on how your vape performs. For instance, coils with a low resistance typically have a large surface area and are designed to absorb more electricity, resulting in greater power and thick, intense vapour output. On the other hand, high-resistance coils operate in smaller surface areas and generate less power, meaning less vapour and a milder vaping experience.
What is Coil Resistance?
Coil resistance, measured in 'ohms', is the resistance a coil has to the electrical current sent from your device's battery. Low resistance coils offer more vapour, while high resistance provide less vapour. Each coil comes with its own resistance, and will determine the vapour output from your vape.
Coils with a low resistance perform best with high-powered sub ohm kits, and those with a high resistance require a low-powered kit. This is because low resistance allows for more power to run through the coil, and high-resistance uses less power for a more subtle vape.
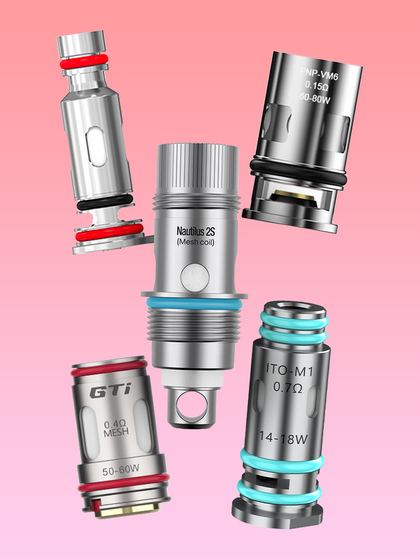
What are the Different Coil Types?
Vape coils come in a range of resistances and cater to various vaping styles. Understanding this is beneficial in helping you decide which coil is most suitable for you and your vape. With that in mind, here is a breakdown of coil types and the experiences they provide:
- Mouth-To-Lung (MTL) (0.8ohm-1.2ohm) - The term 'mouth-to-lung' describes the process of the vapour travelling from your mouth and into your lungs. These coils are popular with new vapers as they produce a similar output to a cigarette, while offering a rich flavour intensity. These coils produce cooler, more discreet vapour and perform best with low-powered pod kits. Ideal for vapers looking for a more controlled vape, with a focus on flavour.
- Restricted-Direct-To-Lung (RDTL) (0.4ohm-0.6ohm) - Ideal for intermediate vapers seeking a blend between mouth-to-lung and direct-to-lung vaping. These coils provide a moderately loose draw and rich flavour without the vapour intensity of a DTL coil. The coils work best with adjustable mod and pod kits - particularly those with an adjustable airflow feature.
- Direct-To-Lung (DTL) (0.1ohm-0.3ohm) - Suited for more experienced vapers. These coils are designed for inhaling the vapour directly into your lungs rather than holding in your mouth first, as with mouth-to-lung vaping. The coils are designed to work with high-powered sub ohm pod and vape kits, and produce thick clouds and warm vapour.
Learning which coil resistance suits you best really depends on what experience you're looking for. Whether it's the cloud-chasing thrill of a sub-ohm vape, or the flavour intensity of a MTL puff, choosing the right coil will help you get the best out of your device.
Vape Coils and E-Liquids
Like vape kits, coils work in conjunction with e-liquids to produce the vapour you inhale. The performance of your coil is heavily dependent on the-liquid you use, which makes this super important.
Once the coil heats up, this will then vapourise the e-liquid, turning it into the vapour that carriers the flavour and nicotine (if applicable). The e-liquid thickness is the main factor that determines whether it performs well with your coil.
Every e-liquid contains two primary ingredients - Vegetable Glycerine (VG) and Propylene Glycol (PG). High VG e-liquids are typically thicker than low VG and require more power for the e-liquid to be vapourised. High PG e-liquids on the other hand are thinner and require less power.
- High VG E-Liquids (70VG+) - As these are thicker e-liquids and require more power, it's recommended they are paired with sub ohm coils (0.1ohm-0.3ohm).
- Low or Medium VG E-Liquids (30VG or 50VG) - These thinner e-liquids require less power to vapourise and perform best with MTL (0.3ohm-1.2ohm) and RDTL (0.4ohm-0.6ohm) coils.
What are the Risks Of Mismatching Coils and E-Liquids?
Choosing the wrong e-liquids can have a damaging effect on your coil's performance. For instance, a low-powered device using a high VG e-liquid may not provide enough power to vapourise the e-liquid - resulting in a burnt coil and dry hits.
Using low VG e-liquid in a high-powered device will often lead to tank leakages, as the e-liquid is too thin for the large wicking ports in sub-ohm coils. Also, as high PG e-liquids produce a stronger throat hit, the excess vapour can create an uncomfortable throat sensation for the vaper.
How Do I Install Coils?
To install a new vape coil, you will usually need to remove the old one from your device. It's important to remember that not all coils work in the same way. For instance, some coils are screw-fit and others can be pushed on. Some coils are replaceable, whereas others are fixed to your vape tank as a combined unit and can't be removed. The coil is usually found in the base of your tank or pod.
Screw-fit & Push-in Coils
Screw-fit coils are some of the most widely used coil types and are favoured for their stability and reliability in preventing leakages in sub-ohm vapes. Push-fit coils on the other hand are quicker to install and reduce the chances of cross-threading.
Here we have laid out the following steps for installing a new coil:
Step 1: Remove your vape tank/pod
Screw-fit & push-fit coils: If you're using a tank, gently unscrew the tank from your device, and empty of any remaining e-liquid. For pods, grip the sides of the pod and gently pull to detach it from the battery.
Step 2: Remove the old coil
Screw-fit coils: For tanks, carefully unscrew the old coil from your tank counter-clockwise, taking care not to damage the threading. If you're using a pod, gently unscrew the coil and remove from the pod.
Push-fit coils: To remove from a tank or pod, you'll need to find an indentation within the tank that will allow you to grip the coil with your fingernails. Once you've found your grip, gently pull to remove it.
Step 3: Saturate the new coil
Screw-fit & push-fit coils: Before placing in the new coil, leak a few drops of e-liquid onto the exposed cotton in order to prevent dry hits and an unpleasant burnt taste.
Step 4: Place in your new vape coil
Screw-fit coils: Carefully screw your new coil into your tank or pod clockwise until secure. Avoid over-tightening as this can potentially damage the threading, leading to leakages and poor performance.
Push-fit coils: Gently slide the new coil into the bottom of your tank or pod until secure.
Step 5: Reassemble your tank or pod
Once you've placed the pod or tank back into your device, you can then fill it with e-liquid. If you didn't saturate your coil on step 3, then leave the coil 5-10 minutes to soak in the e-liquid. You're then good to go!
How Do I Maintain My Coil?
To keep your coil at its best, this can be done with a variation of cleaning and following appropriate procedures. This will ensure a longer coil lifespan and a consistently satisfying vape. For the best results, we recommend cleaning your coil weekly for consistent performance.
Cleaning
The best way to keep your coil clean and fresh is to soak it for anywhere between 5 minutes and a few hours in warm water, although you can also use vodka, vinegar or ethanol as alternatives. By leaving your coil to soak, this will remove any built-up residue.
Note: Avoid soaking in boiling water or scrubbing your coil when cleaning, as this can potentially damage the cotton and/or wire.
Other Maintenance
Keeping your coil clean is one thing, but also following some other procedures will ensure a longer-lasting coil that stays at its best. Choosing e-liquids with the right VG/PG ratio will avoid any unnecessary leakages or coil blockages, while using your device within its recommended wattage range reduces the chances of burning your coil.
Ensuring your coil is well maintained is essential for a high-quality experience. A clean and intact coil will give you smoother vapour, more flavoursome draws and a longer lifespan for the coil, saving you from needless replacements.
When Should I Change My Vape Coil?
This really depends on how happy you are with the flavour, but without maintenance it's generally recommended to replace your coil every 1-2 weeks. Once your coil starts to deteriorate, there are a number of signs that show that your coil may need replacing, which include a loss in flavour, gurgling noises and e-liquid discolouration. Here are the most common signs:
- Flavour Loss - This is usually the most obvious sign that your coil needs replacing. With every draw, a small bit of e-liquid sticks to the coil and cotton, creating a build-up of residue. Over time this build-up will start to clog the coil, reducing performance and flavour.
- Reduced Vapour - When the coil starts to become clogged with residue, it struggles to vapourise the e-liquid. This will lead to a reduced vapour output, and you may notice that your draw feels thinner and less intense.
- Burnt Taste/Dry Hits - Over time as the internal residue builds, the coil will struggle to heat evenly. As hot spots form on the coil, the cotton and e-liquid will start to burn, leaving a burnt, unpleasant taste.
- Gurgling Noise - Once the coil stops wicking properly, this can lead to e-liquid flooding, often resulting in leakages through the airflow and a noticeable gurgling noise as you draw.
- E-Liquid Discolouring - When a coil starts overheating, the e-liquid may turn a dark brown colour. Most e-liquids are usually clear or yellow, but as the coil burns, this colour change is a clear sign of coil deterioration. Typically, most vape pods have a clear window where you should be able to see your e-liquid and often the exposed wicking. Check that these are both clear to know whether your coil needs replacing.
Although most coils don't have a clear lifespan, spotting the above signs will give you the confidence you need in knowing when your coil needs replacing. By keeping this in mind, you can continue to enjoy flavourful vaping while avoiding loss of flavour, burnt hits and poor vaping performance.
What are the Top Tips For Coils?
There are a number of ways you can make the most of your vape coil. This includes proper maintenance, using the right e-liquids and wattage power, and making sure your coil is primed before use. You should also avoid chain-vaping, as this can overheat the coil and lower its lifespan. Here are some of our top tips for the best coil experience:
- Prime your coil: Before using your coil, we recommend adding a few e-liquid drops onto the cotton of the coil. This will give you healthy flavour while preventing dry hits and potentially burning your coil.
- Use the correct e-liquid: Using the wrong e-liquid can lead to issues including a clogged or flooded coil. For coils with a low ohm resistance, these should be used with high VG (70VG+) e-liquids, while high ohm coils are best-suited with low or medium VG (40VG or 50VG) e-liquids. We also recommend avoiding e-liquids with super sweet flavour - these contain sweeteners that can cling to your coil and will gradually deteriorate flavour and performance over time.
- Keep your tank topped up: Without the e-liquid you can't enjoy the vaping, it's as simple as that. Also, by ensuring that your vape tank has a healthy amount of e-liquid, you will keep your coil saturated and avoid any unwanted dry hits.
- Choose the right wattage: We always recommend sticking to the recommended power output displayed either on the coil or its packaging. If you're using a device with variable wattage, remember to stick to the manufacturer's guidelines as this will avoid potential leakages or coil burnout.
- Avoid chain-vaping: Taking regular consistent puffs will put unnecessary strain on your coil and shorten its lifespan. This doesn't mean you can't still enjoy it - just remember to take breaks between puffs to allow the coil to re-saturate.
- Clean your coil: To keep your coil at its best, you should ensure it's kept clean and free from residue. By soaking in warm water for anywhere between 5 minutes to a few hours, this will help clear away residue and ensure better flavour and more consistent performance.
By following the above steps, you can keep your coil performing at its best while enjoying a richer, more consistent and reliable vape.
Conclusion
It goes without saying that coils are the unsung heroes of vapes. While maybe a little daunting at first, these small components are vital in your vape's performance. By understanding vape coils, how they work, debunking vaping myths and by following best practices, you can enjoy a flavourful, high-performing vape. We hope that this guide provides all the info you need for a smooth and satisfying vaping experience.


